 Hello friends, I hope you all doing great. In today’s tutorial, we will have a look at What is Rapid Prototyping? We will also discuss different techniques used in rapid prototyping, Rapid Prototyping Software, Examples, Advantages etc. Have you ever witnessed the manufacturing process of new launches in large-scale and renowned industries? From rough draft to the final approval a lot of steps are involved to launch something new into a competitive market where a single flaw or defect can wipe you and your product off from the market. Rapid prototyping is one of those steps and techniques which helps mitigate that risk and is implied worldwide in many industries and businesses. Before we start our discussion on Rapid Prototyping, let’s first discuss;
What is a Prototype? And why we use a prototype?
A prototype can be defined as;
“The three-dimensional model or imitation of an object or a project that provides the real-time information and visualization regarding its functionality, design and the fact that how much better or worse the product or project would turn out in reality after completion”
We can say that prototyping serves the following purpose
- We make prototypes to decide in the favor of a product or against it.
- It can help us rectify flaws even before the production starts on a large scale, to avoid any future losses.
- Prototyping gives us the idea about the substantial future of the project whether it would be a hit or a miss
- The future product can help gain investors and sponsors if the prototype turns out to be successful.
As of now, we are well aware of the prototype and what is it used for, from now onwards we will be discussing our actual topic, “Rapid Prototyping”. Rapid prototyping has revolutionized the manufacturing process to a great extent, with advancement in technology there comes revolution and ease, you might have witnessed or experienced one or two steps of Rapid Prototyping in your industrial internships or University assignments, in case you have or you haven’t, I’ll be explaining everything in detail, Don’t worry!
Rapid Prototyping definition
We can define rapid prototyping as;
- “Rapid prototyping encompasses an amalgamation of several techniques for making a three dimensional model of a certain product or mechanical part of an object to be manufactured, through data provided by Computer-Aided Design ( CAD) after the approval of the initial design for the product or a smaller part of the product”
Following are some points peculiar to the rapidly prototyped object:
- The model which is produced through this method is scalable, which means that actual values and measurements are used to make a prototype that can be extrapolated on a large scale afterward turning it into a gigantic object.
- Computer-aided design (CAD) data is processed further into reality for fabricating the three-dimensional model after approval from the design team.
- The techniques of additive layer manufacturing and 3D printing is used, in case you don’t know about additive layering and 3D printing, it can be defined as,
“Rendering the use of adding certain materials like plastics, solids, resins and powdered products layers by layer into the design to make the final product.”
Grades of Rapid Prototypes:
There are two grades of prototypes used for this purpose;
- High Fidelity Prototypes
- Low Fidelity Prototypes
High Fidelity Prototypes:
- A prototype that is almost exactly similar to the end product we are opting for is called a high fidelity prototype, it is mainly used in machine design, aerospace, automotive industry and biomedical engineering. We are going to discuss high-fidelity prototypes today which are the face of the present and future!
Low Fidelity Prototypes:
- A low fidelity prototype is a rough imitation of the product or a part we are about to manufacture, it can be on paper or any other medium, this type of prototyping is not much used in machine design and manufacturing.
History and origin
In older times when there was not much advancement in the field of design and manufacturing, it was a very laborious task to shape a model of an upcoming project or a product in three-dimensional forms, the measurements and the outcomes were not that accurate to the extent they needed to be, they were not three dimensional either and were made from wires and hooks, yes! You heard it right! Our forefathers used to make planning and development models by hand and that too with wires!
Pioneer of Rapid Prototyping
- Research and development was a nerve-wracking task back then, until in 1970 when Unix Circuit Design System also called as USDS surfaced on the horizon, Henryson and his colleagues at Bell Labs laid the foundation of a new era.
Evolution with Time
- Just like human beings evolved and adapted to the environment with time, in the same way, our technology evolved too, the following are some of the happenings which tremendously changed the future of Rapid Prototyping:
Topography
- In 1982 the technique of TOPOGRAPHY was widely used, it involved using resin plates with designed edges and contours on them, combined together to form a model.
Photopolymers
- In 1974 photopolymer resins were used along with the topographical techniques in order to harden the slices of different layers which were glued together later on for making the final product.
Photo sculpturing
- After photopolymer resins and topographic techniques, finally in the 19th-century photo sculpturing was introduced to make a 3 Dimensional image which was an achievement in itself indeed!
Topography and Photo sculpturing
- In 1944 Topography and Photos culturing were merged to form a more detailed three-dimensional model on different materials and objects.
Computer-Aided Design
Charles Hull was one of the first persons involved in the development of CAD, a computer-aided design which later on turned into the first rapid prototyping system after which there was no going back, technological advancements took this method to a whole new level making 3D modeling achievable and easier than ever before.
We do not need an in-depth history of rapid prototyping, for now, this section was only intended to make a foundation so that you may understand simple processes that were involved in modeling objects which later on evolved into the complex processes and techniques we use today for this purpose. Don’t worry, we will be discussing the techniques involved in Rapid Prototyping in the next section!
Rapid Prototyping vs Traditional Prototyping
The prototyping that was done in older times was regarded as the traditional prototyping.
Following are some distinguished points that would help you understand the difference between Traditional prototyping and Rapid Prototyping:
Modernity
- Rapid prototyping is a modern technique meanwhile traditional prototyping as the name implies an older approach.
Time and Effort
- Rapid Prototyping is time-saving and efficient meanwhile traditional prototyping consumed a lot of time and effort.
- A lot of manual and laborious tasks have been cut down by the use of rapid prototyping which was a part of the traditional approach years ago.
Precision and Accuracy
- Rapid prototyping intends to be more accurate and precise with the help of modern techniques and methods developed over time, on the other hand, traditional prototyping was a bit of a hassle with the least amount of accuracy and precision.
Material Versatility
- Traditional prototyping techniques involved the use of wire frameworks manually to make a prototype of a product, meanwhile, rapid prototyping can implement a huge variety of industrial-grade manufacturing materials for the production of a prototype.
3D Slicing in Rapid Prototyping
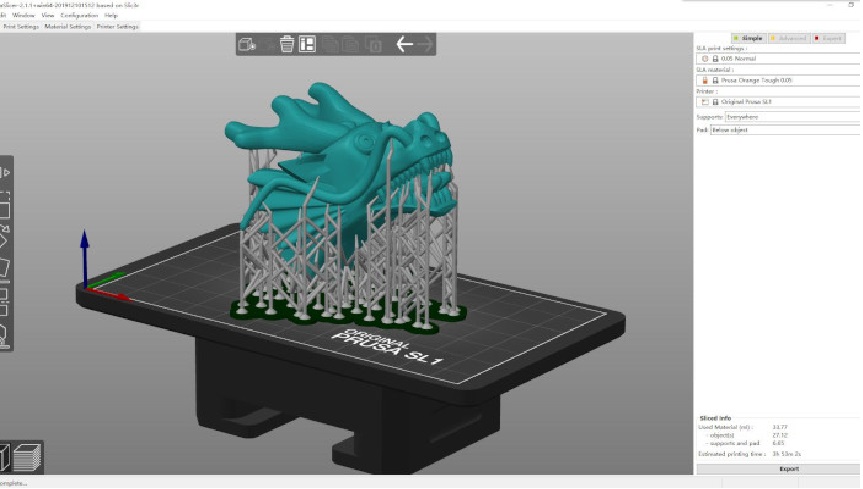
Before studying the techniques involved in the process of rapid prototyping, you must be aware of the concept of SLICING, which is used in the process of 3D printing while making a rapid prototype of an object, 3D Slicing is comparable to slicing a big loaf of bread, let me explain how! consider a loaf of bread, when a loaf of bread is baked it is not in individual slices instead we make bread as a big chunk of flour and added ingredients, after baking, it is split into individual slices to make a sandwich or a toast, in the same way, these 3D designs are created as a single unit which is later splatted. So, slicing can be defined as;
- “Splitting of the 3D design into individual layers for additive layer 3D printing”
- This process is also called layering
- 3D slicing is carried out by 3D Slicer software used as an extension of AutoCAD or Solid Works
- 3D slicer is a free, open-source software
- It allows a systematic, smooth workflow when paired with any of the modeling software like AutoCAD or SketchUp.
Rapid Prototyping Techniques
- Rapid prototyping employed 3D and additive printing initially, the use of these two extended to such an extent that people started recognizing 3D printing and Rapid Prototyping as one entity, but it not true to be accurate!
1. 3D Printing:
- Rapid prototyping has evolved to a much higher level since its organ as we discussed earlier, although 3D and additive printing is still used for rapid prototyping but they cannot be regarded as two names for the same thing, so cutting it short, let’s find out how 3D printing works.
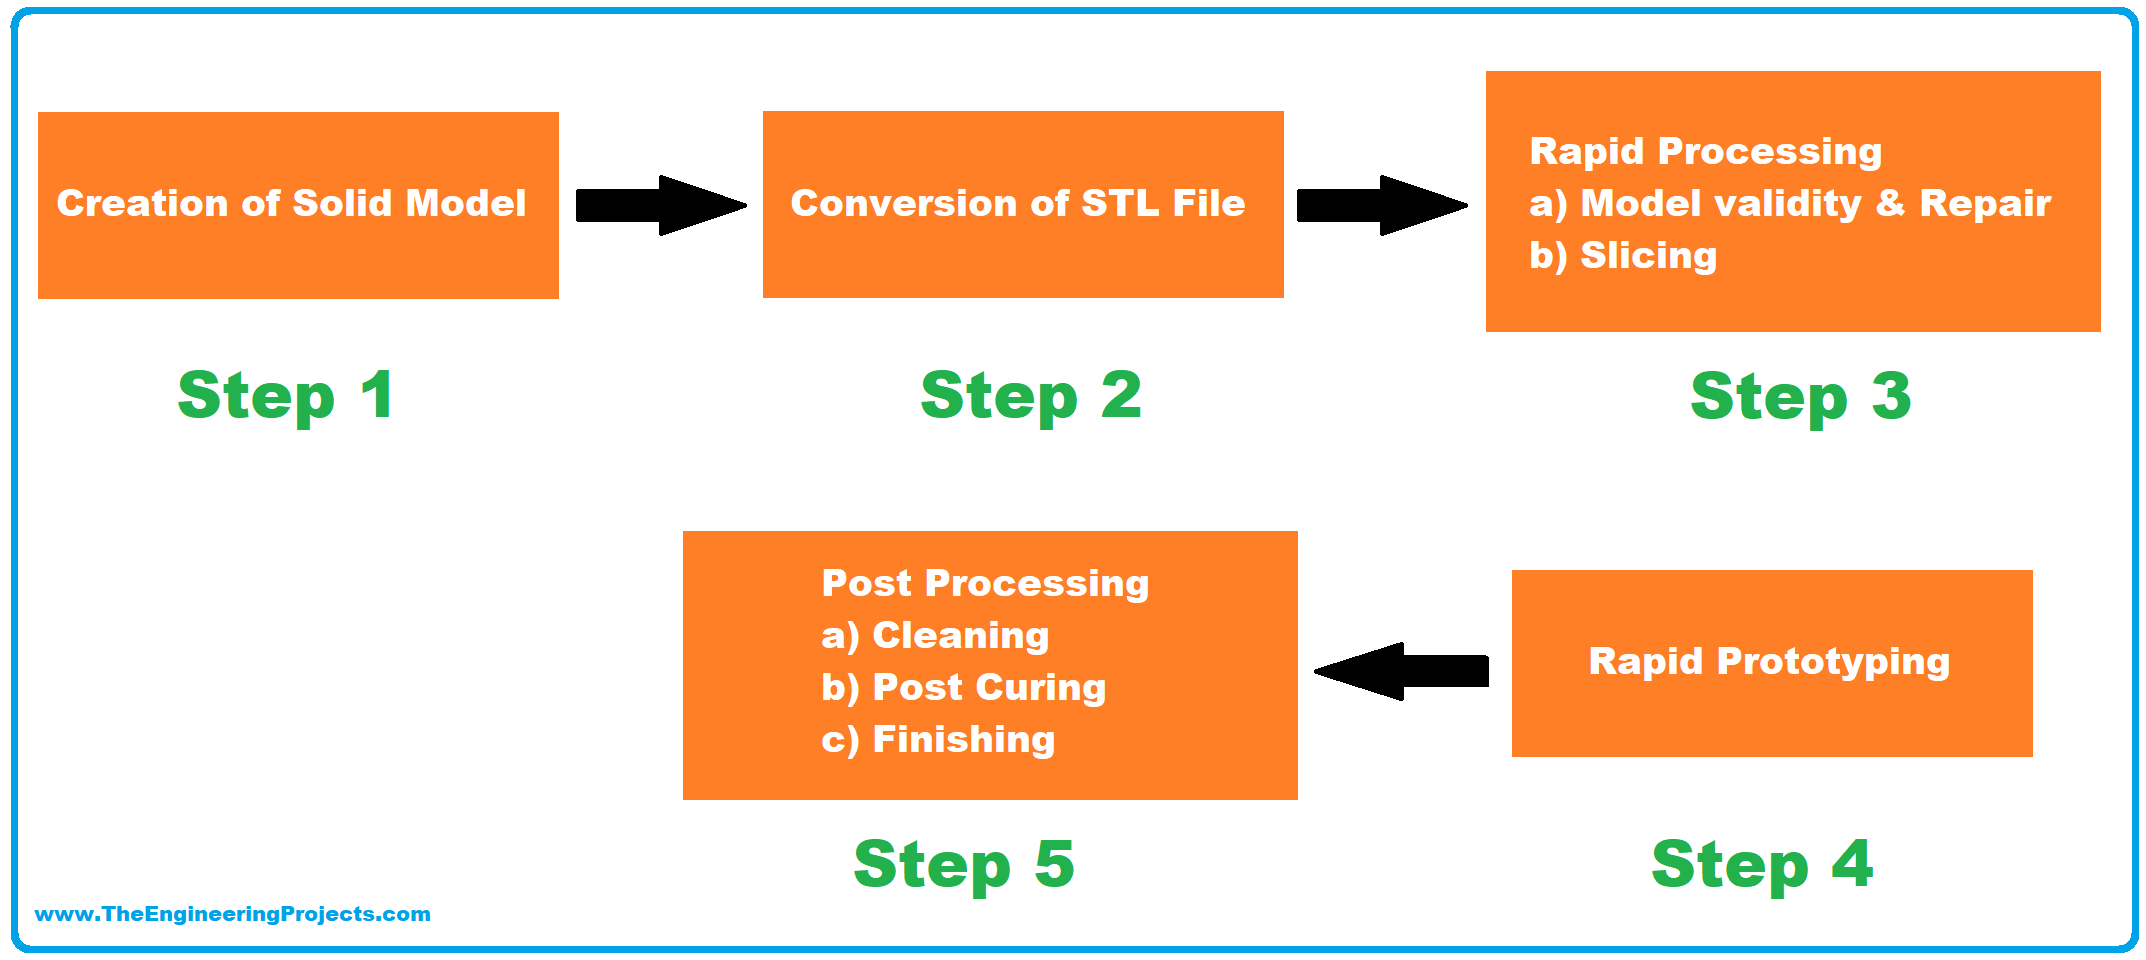
- Following is the step by step process which takes place when we model a prototype through 3D printers;
Step 1:
- As the first step, a completely computer-based model is designed with all the dimensions that the final product would have.
- Designing process takes place through Computer-Aided Design software also commonly Known as CAD.
Step 2:
- Secondly, the data from CAD software is extracted and fed into the 3D printer for modeling.
Step 3:
- 3D printer requires STL file format for conversion of CAD design into a 3D model.
- After file extraction and translation, slicing and layering are carried out to model the final 3D product using triangular facets.
Similar to 3D printing are some complex techniques as well which are being used commercially on large scale, here is a brief introduction to each of them,
2. Selective Layer Sintering or SLS:
- Selective layer sintering refers to the process which requires a powder bed and laser beam to form the prototype layer by layer, a laser beam is projected on the powder bed which helps in the incarnation of the design on the plates, this process is not much appreciated due to roughness of the prototype manufactured.
3. Stereolithography, SLA or VAT Photo Polymerization:
As the name suggests stereo lithography makes use of an ultraviolet laser beam to carve the design on the light-activated resin sheet. If you don’t really know about light-activated polymers or photopolymers and how they work, then you must know that these are substances that alter their shapes when exposed to a certain wavelength of light on specifically exposed areas. The most commonly used photopolymers include Acrylates and Methacrylate added with other materials to prevent shrinkage of the photopolymers while slicing the design.
4. Material jetting:
Materials jetting is less expensive than other methods discussed earlier, it is considered a good choice for 3D modeling when it comes to design and development in small-scale industries. Material jetting is also known as fused depositing modeling or FDM, a thermoplastic filament is used in the process for slicing the product. The product is made layer by layer in it but the only difference is the presence of thermoplastic filament which is present in the nozzle of the barrel, being melted at the time of modeling! , During the initial days of FDM the results were a bit off in appearance but now the quality has considerably improved.
5. Selective Laser Modeling or SLM:
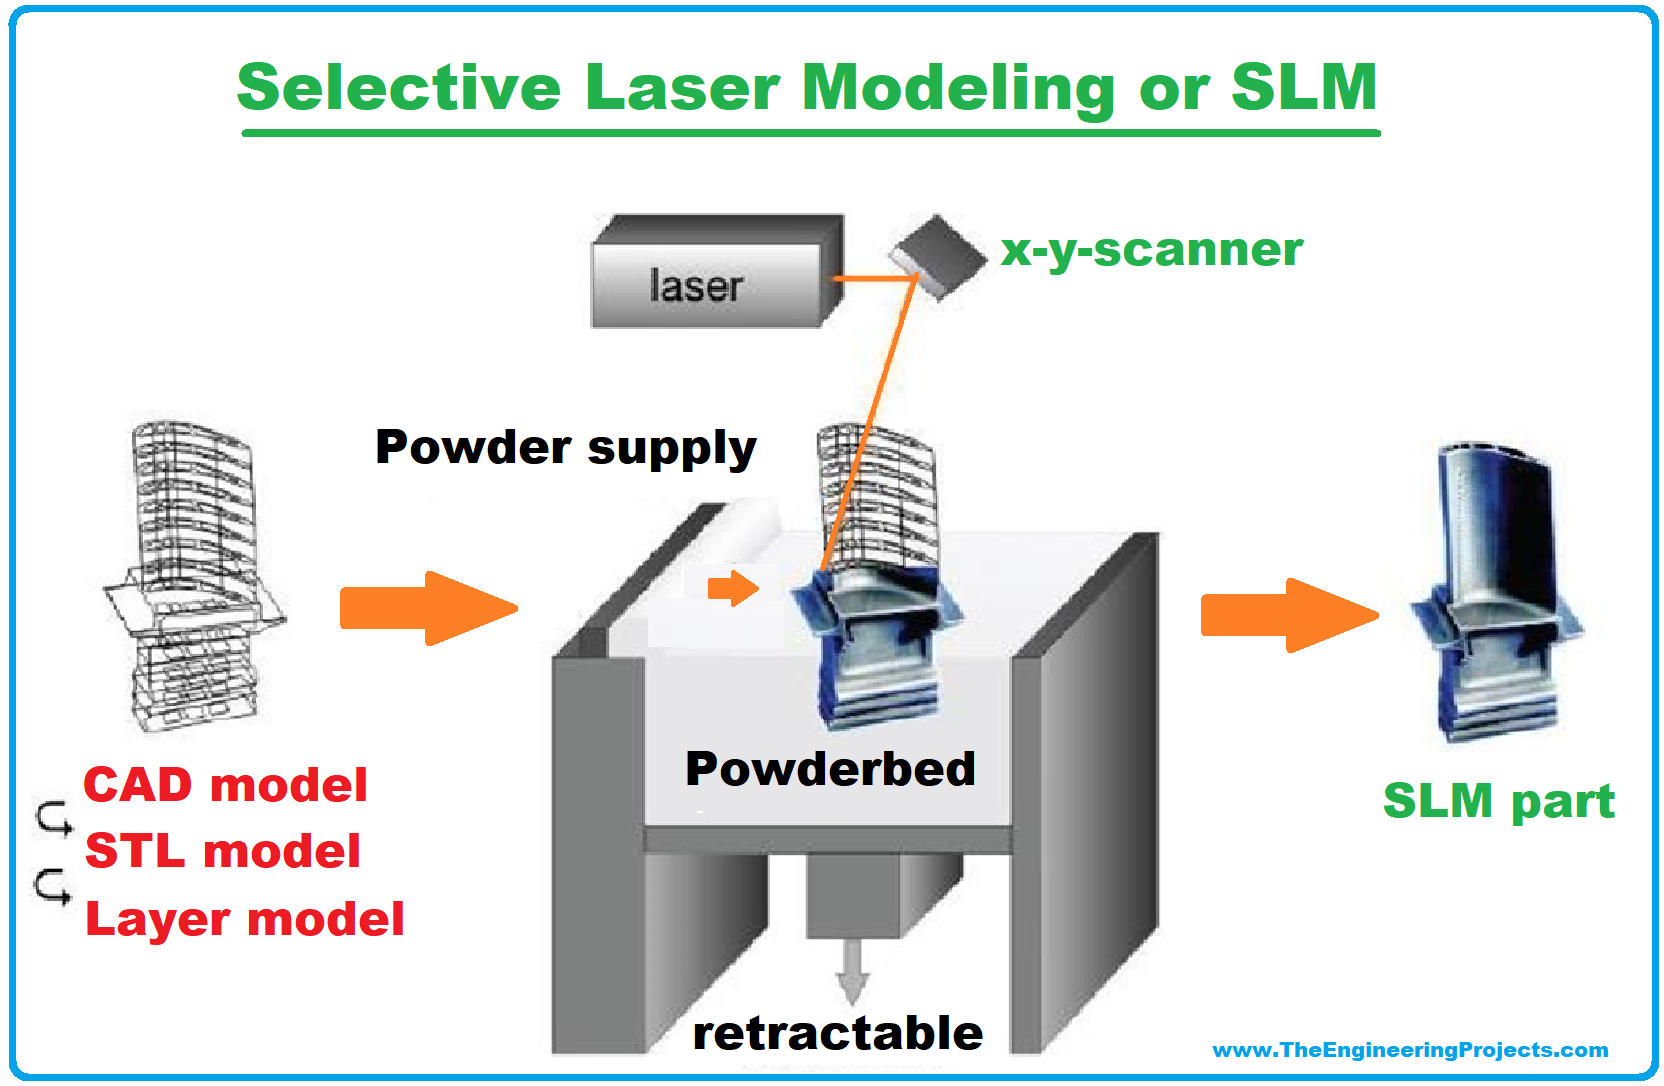
It is also known as Powder Bed Modeling and has a wide range of application in industries which require precision and accuracy at any cost and can invest on anything that fulfills this demand. Powder Bed Modeling as the name suggests making use of high-quality metal powders including Aluminum, Cobalt and Titanium. These powders are then melted with a very high-intensity laser beam to shape the layers of the prototype being produced. SLM is used in the aerospace, medical, automotive and defense industries, give it a thought, all these industries cannot miss their targets at any cost, isn’t it? That’s why they use this SLM prototyping technique, which is expensive yet reliable and durable.
6. Binder jetting:
Binder jetting works almost the same as selective Laser modeling but there is only key difference in the process of making a prototype, the process is not carried out in slices and layers as done in selective laser modeling, all the layers are made at once binding them with one another with a binding agent. Microfine droplets of liquid are sprayed on the top of the powder bed which acts as a strong adhesive for the powder molecules to bind together forming a layer, the layer just produced is not removed then, it is compressed to start another layer on it. The layers made altogether are put into an oven or a unit that burns the binding agent making it look seamlessly combined in place.
7. Laminated Object Manufacturing or Sheet Lamination:
You might have guessed the process by the title till now, Laminated Object Manufacturing makes use of thin laminations or layers produced one by one. These laminations are produced with the help of a laser beam or any other software which helps carve the design on the laminations. Once the individual laminations are done, they are glued together with an appropriate binding agent to form the final prototype. This technique is relatively inexpensive than the techniques we have studied above.
8. Digital Light Processing or DLP:
Digital light processing is one of the new advancements in the field of prototyping, DLP technology makes use of digital projection light beams. These projection light beams then carve out the three-dimensional design on the surface of the photopolymer layer. Digital light processing and SLA is also known as Stereolithography only differ in the use of projection light instead of the laser beam on the resin photopolymers for prototyping. The process is fast as compared to other available options in the industry and can be used for a variety of materials to create the desired 3D prototype.
Rapid Prototyping Software
- As we are done with the basic understanding of Rapid prototyping and its techniques, you must be wondering which software are involved in the process, I have got you covered!
Following are the few well-known software being used in the process, just keep one thing in mind, you are not restricted to stick to any one of them, these software provide a complete visualization of the design from every nook and corner, the thing that suits you the best can be used, so here’s the list :
- Solid Edge.
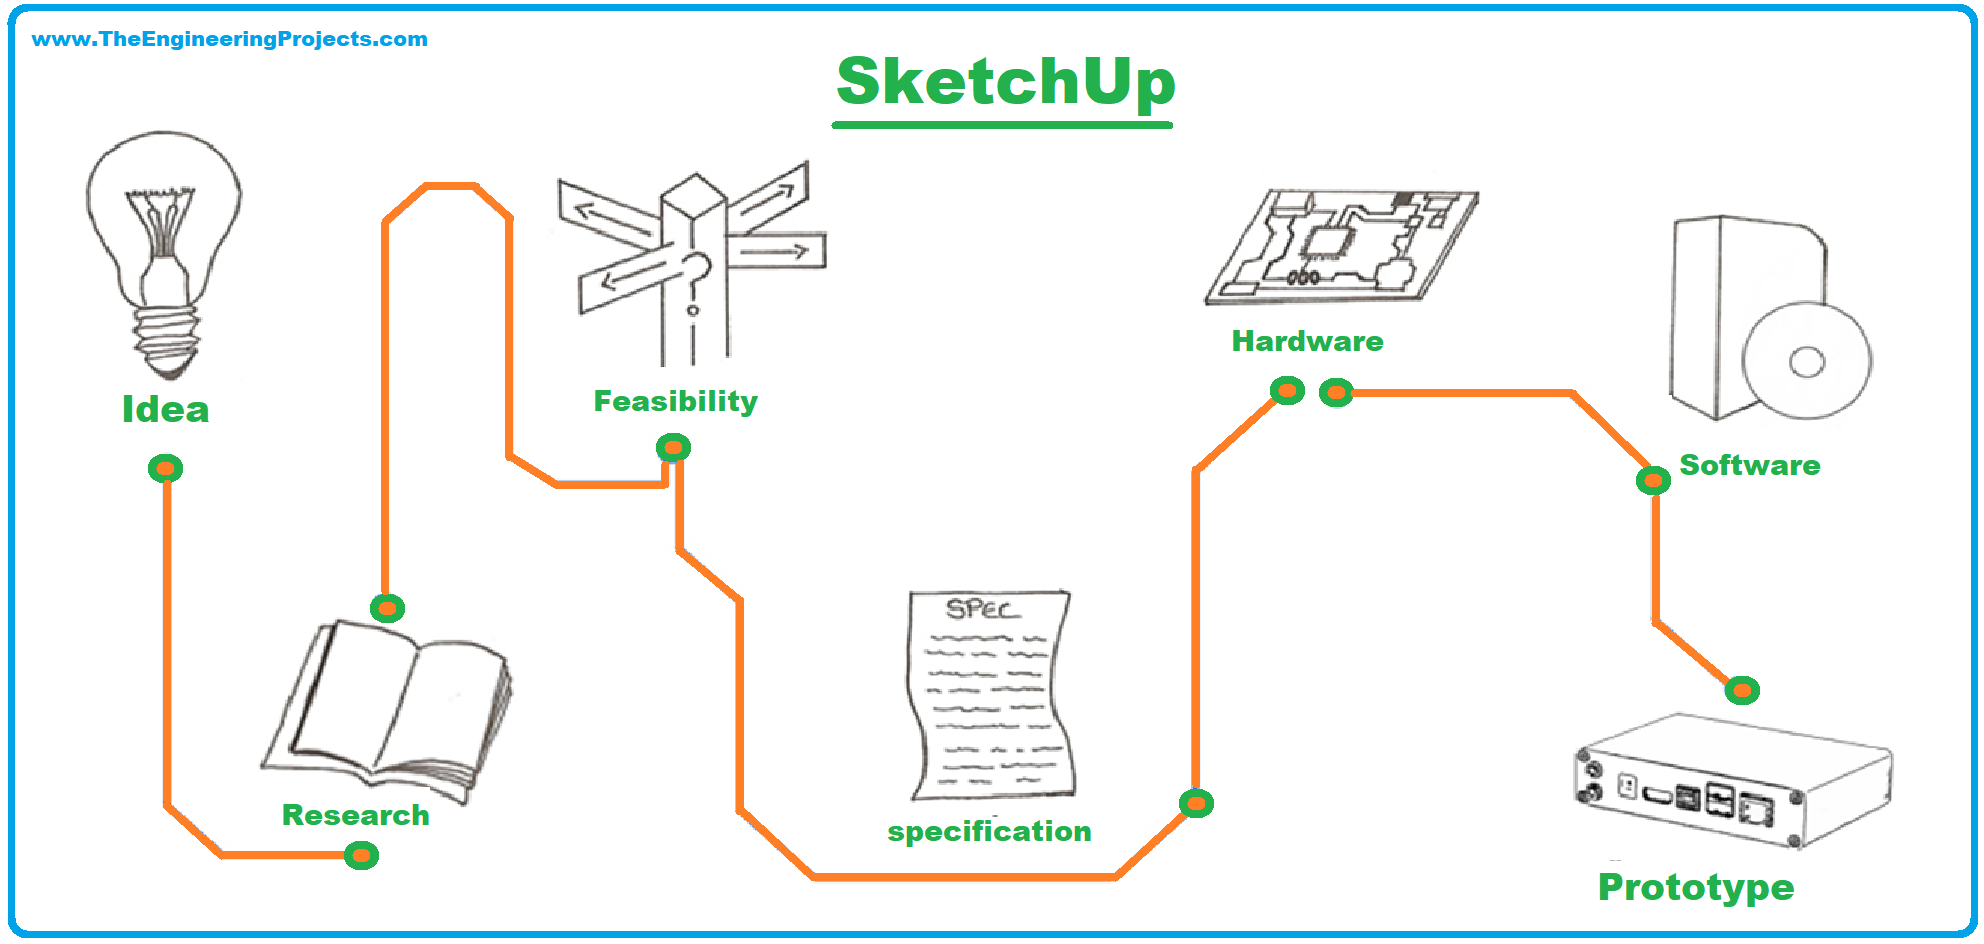
- Sketch up.
- SolidWorks.
- AutoCAD.
We will briefly discuss each of them so you might get a clear idea of what they actually do and choose for yourself!
1. AutoCAD:
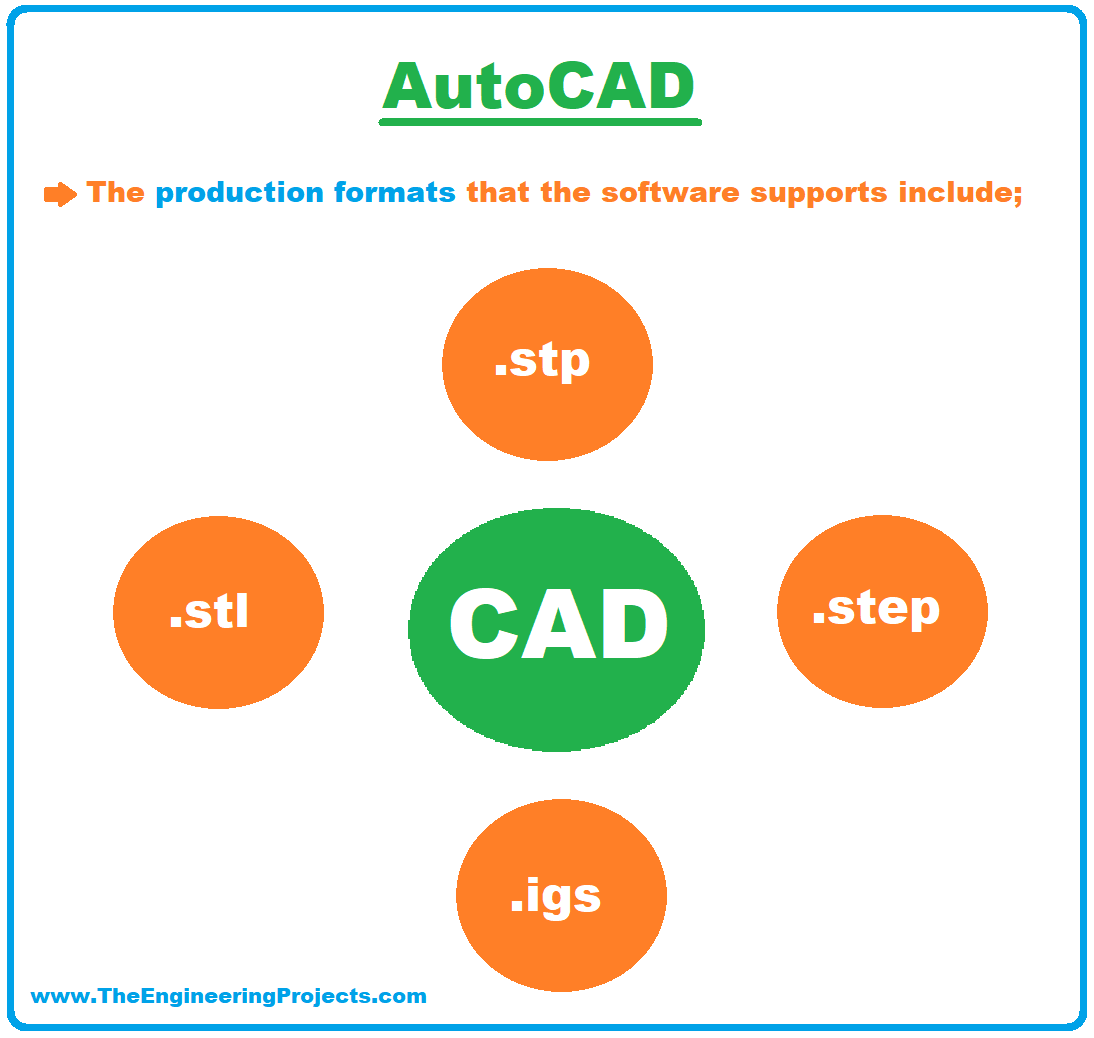
Who is not aware of AutoCAD? The insanely famous software of all the software being used in the 3D modeling of prototypes. It is used for creating a 2D or 3D blueprint of the prototype. AutoCAD has a wide range of functionalities that help make a design with accuracy and precision. It is widely used by engineers in automotive, aerospace, biomedical, architectural and manufacturing fields. The Industrial file formats supported by AutoCAD includes;
- dwg
- dxf
The production formats that the software supports include;
- stp
- igs
- step
- stl
2. SketchUp:
SketchUp is similar to AutoCAD but is comparatively less complex in interface and design, 2D and 3D modeling can easily be done with the help of Sketch Up. SketchUp is highly liked by the designers for providing better rendering of the designs to give a clearer picture of what you would be getting in your hands if you invest in a certain product or project.
3. Solid Edge:
If you are somehow related to any of the engineering fields you must have heard of solid edge software for 2D and 3D modeling of the designs, there are many additional features that make the solid edge a go-to option for its users, product lifecycle management from third parties and finite element analysis being two of them. Solid edge provides Synchronous technology so that the user may switch between parametric and direct modeling whichever suits him best, by the help of this functionality you can edit a single aspect of the design individually without disturbing the whole design.
4. Solid Works:
Solid works and solid edge are always in comparison with each other being the talk of the town, this software may have some common features when come to designing and simulation like 2D and 3D modeling like many others, but Solid works differ from the solid edge in providing simulations for liquids as well, on the parallel lines it can also predict the stress withstanding capabilities of certain parts of the assembly with the help of stress analysis.
5. Other Software:
There are many other software for 3D modeling like Creo, Inventor, fusion 360, CATIA and blender among many others. You can easily learn any of them by watching tutorials and practicing the designs again and again.
One must keep in mind the difference between the real world and the 3 Dimensional world, a lot of factors limit the viability and feasibility of a 3D model in the physical world which was rather possible in your 3D files!
Example of Rapid Prototyping
You might have heard and observed a lot of things involving Rapid Prototyping especially if you’re an engineering or a biomedical student, or if you design orthoses and prosthesis for disabled people, here is a step by step example of process rapid prototyping includes;
- Rapid prototyping is used in machine design, an engineer who has specialized in machine design makes a 3D model of the product or part of an assembly in his desired software according to his requirements.
- The 3D files made by AutoCAD, Sketch-Up, Creo or any other software are later on approved by higher authorities.
- After approval these files are further moved on to the next department for 3D printing, the file is then translated into the file format which is apt for the 3D printer.
- An appropriate technique is then chosen out the available options, the technique employed could be SLA, SLM, Material jetting or Lamination, and it solely depends on the demand and available resources.
- The prototype is then modeled according to its design in a 3D shape.
- This three-dimensional model is then presented for approval and is used to attract investors as well, it can also identify the flaws and loopholes in the final product that the designer might have missed while making the design.
Applications of Rapid Prototyping
There are numerous applications of Rapid Prototyping and here I am mentioning few of them:
Assembly Parts
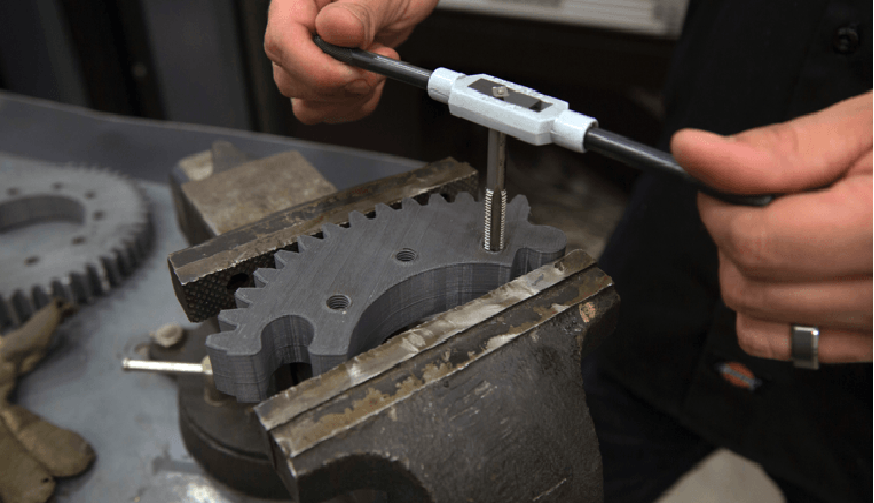
- Rapid prototyping is used in making assembly parts for machines, individual parts can be designed and manufactured according to the need.
Development of Artificial Body Parts
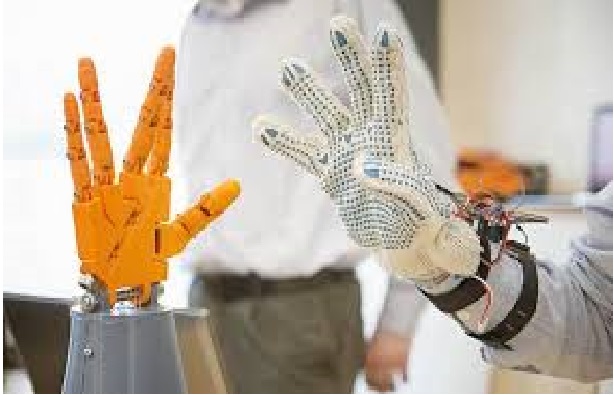
- Biomedical engineers can use rapid prototyping for making a model of artificial limbs either legs or arms.
Dental Industry
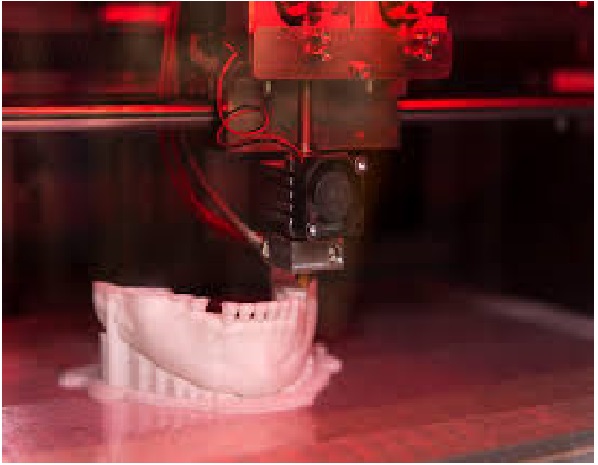
- Dental implants and dentures can be manufactured with the help of rapid prototyping.
Electronic Circuits and Boards
- An electronic circuit or a loop can be preliminary designed and modeled through this technique.
Aerospace Industry
- Rapid prototyping is also used in Aerospace Industry for designing new parts and tools in order to replace the outdated ones
Prototyping A Building
- Civil engineers take refuge in Rapid Prototyping when they’ are asked to present the three dimensional model of the building, bridge, mall or any large scale monument to their investors, you might have seen small-sized models of the building prior to the commencement of the project, Haven’t you? That’s the rapid prototype of that building!
Usage in Hospitals
- Rapid prototyping is also used in hospitals where advanced technology is used for surgical operations, you might have seen the seasons like The Good Doctor and The Night Shift when they are about to perform a complex surgery e.g. removal of a lesion from a certain body part, they firstly perform a three-dimensional analysis then a prototype is made to explain the complexity of the procedure to be done.
Jewelry Design
- Jewelry designing implies the use of Rapid Prototyping as well, the design to be produced in bulk quantities is prototyped first for approval and after design approval sent to the production house.
Currency Notes and Coins
- Currency and coins are also prototyped first before their release and presented to higher-ups of the state first.
Replacement of Small Parts
- Small parts of airplanes and jets to be replaced are rapidly prototyped when needed to replace by the new ones.
Automotive Industry
- The automotive industry is one of the largest manufacturing industries, a huge amount of assembly parts are needed in bulk, even a small defect in design can cost billions if not pointed out in the initial design that is the reason we automotive industry makes use of rapid prototyping before implementing a new design or spare part.
Robotics
- When I was in school whenever I heard of the prototype I used to think of it as a kind of robot, I fancied a prototype as a robot which was clearly nowhere near reality, but nowadays robotics do implement the use of rapid prototyping to save their time and energy experimenting on new features and models of robots.
Designing New Models
- A new model for a car or a heavy bike, for a ship or a submarine, or anything that has something to do with machine design is rapidly prototyped first and then manufactured after approval.
Analysis
- Rapid prototyping is also used for analysis, such as finite element analysis, withholding capacity of a part or a structure on the whole, durability and flexibility of the product under study.
Advantages of Rapid Prototyping
We are almost at the end of our discussion about rapid prototyping, I hope and I expect that you might have grasped the concept by now!
Everything in this world has its advantages and disadvantages, nothing has been made perfect but let’s highlight a few advantages of rapid prototyping.
Time-Saving
- In this modern world where every minute of a man’s time is calculated on the scale of progress, who doesn’t love time-saving technologies?
- Rapid prototyping saves your time and energy by helping you identify the flaws in your design at a very initial level.
Value for Money
- A small defect can cost millions to companies that invest in a competitive market, a prototype not only saves time but also saves money.
Determining the Future
- Rapid Prototyping can determine the future of a project, if liked and appreciated it can attract clients which means it can attract money and investment for the production.
Pace
Prototyping is for the people who are at a high pace, slow and slovenly cannot win the race in this era, to be a rabbit who wins the race this technology is a go-to solution for turning your visualization into reality within no time, In older times when rapid prototyping was not a thing, people used to spend months and years over making a design which used to be flawed and messed up in the end. The models which used to take years of grind are now made in weeks, this benefit implies a greater pace at which a product can be launched into the market.
Cost Reduction for a Project
When a prototype is made in a week or two, it leads to the approval and production within a shorter period of time, you’ll have to pay for lesser days to your staff which cuts down the overall cost of the project.
Room for Trial and Error
There is a lot of room for trial and error when you are using this methodology, even if your designs get rejected in the first attempt you can always give it another try and so on, because of the fact that 3D printing is extremely cost-effective, and you haven’t paid for the mass production of an article yet, it is the price for a single 3D model which can be compensated later on with the success of your product.
Versatility of Materials
Let’s suppose you want to make a screwdriver, firstly you’ll make a design in your desired software may be AutoCAD, sketch up or anyone you like, after that you would contact the 3D printing services or any related agency for 3D printing, they would make a 3D print of your product, but now you want to test the materials which can be implied to make the screwdriver, what would you do? You’ll definitely ask your service provider to make an imitation for the materials you want to test, they can make dummy materials for the testing of your product making it possible to test the end product with different materials. You can choose the best one for your final product when it is all set for production!
Assessing an Array Of Design Variations
Rapid prototyping helps test a huge number of design variations for a single product, you can alter any dimension of your product at hand according to your requirements. Previously it was not possible for the engineers to test as many designs as they wanted because of expensive machining processes, but now it is possible without worrying about the huge amount of money.
Altering a Single Part in the Whole Assembly
With rapid prototyping you don’t have to make your design from scratch whenever you figure out a loophole in your design, the defective layer in the design can easily be replaced without disturbing the whole product at hand.
Manufacturing on A small Scale
Rapid prototyping not only allows the creation of scalable models, but it also allows the production of assembly parts in limited quantities being cost-effective and efficient too.3D printers are much cheaper and cost-effective than large production units.
Disadvantages of Rapid Prototyping
- We have observed a lot of advantages related to Rapid Prototyping, but nothing on this Earth has been made without flaws, here are a few drawbacks of this technology:
- 3D modeling might create a highly unachievable model of a product, which may not be scalable in real life.
- Material imitated and tested in 3D printing can, later on, prove to be fragile and breakable when it comes to real-world material procurement.
- The actual product might not be able to bridge the distance between the three-dimensional world and the real world.
Summing up, we can say that Rapid Prototyping is a lifesaving technology that is evolving day by day, learning 3D modeling and related software would add to your skillset being a valuable in-demand skill these days, you can definitely capitalize on it once you are a pro.it would be a great investment indeed, a right investment at the right time pays back in the future! So, that was all about it, I tried to keep rapid prototyping simple and easy for you, hopefully, you might have understood the basic concepts and techniques involved in the process, along with its pros and cons. I’ll see you soon with another interesting topic, stay tuned!
JLCPCB – Prototype 10 PCBs for $2 (For Any Color)
China’s Largest PCB Prototype Enterprise, 600,000+ Customers & 10,000+ Online Orders Daily
How to Get PCB Cash Coupon from JLCPCB: https://bit.ly/2GMCH9w
The post What is Rapid Prototyping? Techniques, Software, Examples and Advantages appeared first on The Engineering Projects.








No comments:
Post a Comment