
 Hi Guys! Hope you’re well today. I welcome you on board. In this post today, I’ll walk you through the Introduction to ESP32-DevKitC.
The ESP32 is an entry-level development board that belongs to the ESP32 series. This device comes with a rich peripheral set. You’ll get hassle-free prototyping with the built-in ESP32 Pinout.
I suggest you buckle up as I will detail the complete Introduction to ESP32-DevKitC covering datasheet, pinout, types, features, and applications.
Let’s get started.
Introduction to ESP32-DevKitC
-
- Produced by Espressif, the ESP32-DevKitC is an entry-level development board that belongs to the ESP32 series.
- ESP32 is an efficient quality board customized for scores of applications and is perfectly compatible with Arduino IDE.
- The I/O pins on board are installed as female pin headers on each side of the board. This provides easy and hassle-free interfacing.
- This device features Bluetooth and Wi-Fi functions where the rich peripheral set is available for rapid prototyping.

- This tiny component comes with ready-made system requirements. All you need to do is plug this device using a USB cable and play with it on the fly.
- Boot-mode and reset buttons are incorporated on board and it includes various ESP32 modules covering ESP32-SOLO series of modules, ESP32-WROVER series, and ESP32-WROOM series.
- USB micro connector and USB-UART Bridge, and LDO regulator are also included in the device.
- The ESP32-DevKitC pinout allows the prototyping on a breadboard.
- The LDO output onboard is mainly used to power up the off-board additional electronics.
- The outputs of peripherals are joined together to provide easy prototyping.
ESP32-DevKitC Datasheet
Before you incorporate this device into your electrical project, it’s wise to go through the datasheet of the component that features the main characteristics of the device. You can click the link given below to download the datasheet of ESP32-DevKitC.
Types of Boards
The following are the five boards that are included in ESP32-DevKitC.
- ESP32-DevKitC-32E (4 MB Flash Memory)
- ESP32-DevKitC-32UE (4 MB Flash Memory)
- ESP32-DevKitCVE (8 MB Flash Memory and 8 MB PSRAM)
- ESP32-DevKitCVIE (8 MB Flash Memory and 8 MB PSRAM)
- ESP32-DevKitCS1 (4 MB Flash Memory)
ESP32-DevKitC Pinout
The following figure shows the pinout diagram of ESP32-DevKitC.
ESP32-DevKitC Pin Configuration
- Power: Power is applied through Micro-USB, 3.3V pin, 5V pin, and GND. Regulated 5V is supplied to this pin which is further regulated to 3.3V to power up the board. And 3.3V pin directly supplies the 3.3V regulated to the board. And the ground is connected to GND.
- Enable: The enable pin is represented by ‘En’ on the board and is used to reset the microcontroller.

- Analog Pins: Analog pins are represented as ADC1_0 to ADC1_5 and ADC2_0 to ADC2_9 on board. These pins are used to measure the analog voltage in the range from 0-3.3V which is a 12-bit 18 channel ADC.
- DAC pins: Two pins DAC1 and DAC2 are used for digital to analog conversion.
- I/O Pins: I/O pins are represented as GPIO0 to GPIO39 on board which projects there are total 39 I/O pins on board. All of them can be used as an input or output but pins from 34 to 39 are used for input only.

- Capacitive Touch Pins: These pins are represented as T0 to T9 on board. These are total of 10 pins which are touch pins that are normally used for capacitive pads.
- RTC GPIO pins: These pins are represented as RTCIO0 to RTCIO17 on board which are total of 18 pins. These pins are employed to wake up the ESP32 from deep sleep mode.
- Serial: Two serial pins are represented on boards as Tx and Rx. The Tx is used to transmit serial data while Rx is used to receive serial data.
- External Interrupts: All GPIO pins can be used as external interrupts.
- PWM: Any GPIO pin can be used as PWM pins. These GPIO pins are activated through software.
- VSPI: These pins are represented as GPIO23 (MOSI), GPIO19 (MISO), GPIO18 (CLK) and GPIO5 (CS) which are used for SPI-1 communication.
- HSPI: These pins are represented as GPIO13 (MOSI), GPIO12 (MISO), GPIO14 (CLK) and GPIO15 (CS) which are used for SPI-2 communication.
- IIC: These pins are marked as GPIO21 (SDA), GPIO22 (SCL) which are used for I2C communication.
- AREF: It is marked as AREF which is used to provide a reference voltage for input voltage.
ESP32-DevKitC Features and Technical Specifications
The following table shows the main features and technical specifications of ESP32.
| ESP32-DevKitC Features and Technical Specs | ||||
|---|---|---|---|---|
| No. | ||||
| 1 | Maximum Operating Frequency | 240MHz | ||
| 2 | Microprocessor | Tensilica Xtensa LX6 | ||
| 3 | Operating Voltage | 3.3V | ||
| 4 | DAC Pins | 8-bit, 2 Channel | ||
| 5 | Analog Input Pins | 12-bit, 18 Channel | ||
| 6 | DC Current on I/O Pins | 40 mA | ||
| 7 | Digital I/O Pins | 39 (34 are normal GPIO pins) | ||
| 8 | DC Current on 3.3V Pin | 50 mA | ||
| 9 | Communication | SPI(4), I2C(2), I2S(2), CAN, UART(3) | ||
| 10 | SRAM | 520 KB | ||
| 11 | Bluetooth | V4.2 – Supports BLE and Classic Bluetooth | ||
| 12 | Wi-Fi | 802.11 b/g/n | ||
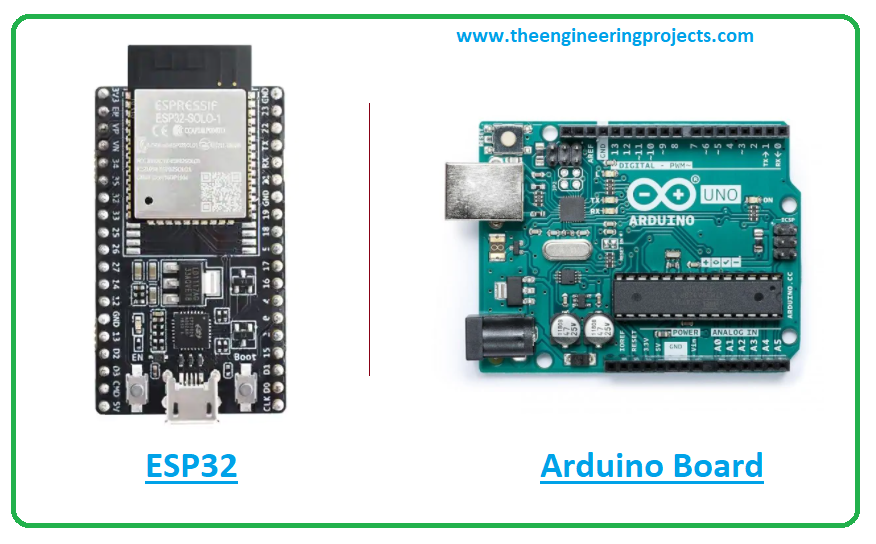
Difference between ESP32-DevKitC and Arduino Board
- The Arduino device is costlier than ESP32. The price of the ESP32 board is around 7$ at the time of writing this article while Arduino boards start at around 22$.
- Moreover, there is a difference in the operating voltage of both devices. The Arduino board operates at 5V while this ESP32 operates at 3.3V. The ESP boards can operate at 4V with more operating time than those who work at 3.3V. On the other hand, the Arduino board won’t work at 4V.
- Another difference lies in the power supply of both boards. The Arduino boards come with a power supply with a range between 7V to 12V. While the power supply in the case of ESP32 stands between 2.5V to 12V.
- Another difference lies in the current consumption. The ESP32 microprocessor comes with very low current consumption that stands between 15uA to 400mA. And if the deep sleep mode is activated on the module, this consumption is further reduced.
- The ESP32 board carries only 1 or 2 analog pins while these pins are higher in number in case of Arduino board i.e. analog pins range between 5 to 15 pins in case of Arduino board.
- The PWM pins are more on the ESP32 board compared to the Arduino board.
ESP32-DevKitC Applications
- Used in Network projects.
- Employed for beginner level DIY projects.
- Employed in the prototyping of IoT devices.
- Used in projects that require Multiple I/O interfaces.
- Used in low power battery-operated applications.
That was all about the Introduction to ESP32-DevKitC. If you have any questions, you can approach me in the comment section below. I’ll help you according to the best of my expertise. You’re most welcome to share your valuable feedback and suggestions around the content we share so we keep coming up with quality content customized to your exact needs and requirements. Thank you for reading the article.
JLCPCB – Prototype 10 PCBs for $2 (For Any Color)
China’s Largest PCB Prototype Enterprise, 600,000+ Customers & 10,000+ Online Orders Daily
How to Get PCB Cash Coupon from JLCPCB: https://bit.ly/2GMCH9w
The post ESP32-DevKitC Datasheet, Pinout, Features & Applications appeared first on The Engineering Projects.
No comments:
Post a Comment